前言:
在项目使用私有库,能带来以下好处:
代码复用:可以很方便地在多个项目中使用一份代码模块化:比如可以按照业务模块/公共模块/基础模块将代码分类到不同的库中,使项目整体结构清晰、同时可以减少代码间的耦合,提高代码质量易于维护:当业务变化时,只需在私有库中更新,然后就能轻松推送到使用这个私有库的所有项目中。提升开发效率:一次编写,就能在多个项目重化工复用,提高开发效率,节省时间。持续集成:可以与CI/CD工具集成。私有库更新后可以自动地被推送到所有相关的项目中,让项目都能使用最新版本的库。
1、前期准备
- 安装并使用
CocoaPods
2、创建过程
假设我们的库的名称就叫XPod,只需要在目标文件夹中,使用创建指令:
pod lib create XPod需要设置用户名及邮箱
Cloning `https://github.com/CocoaPods/pod-template.git` into `XPod`.
Configuring XPod template.
! Before you can create a new library we need to setup your git credentials.
security: SecKeychainSearchCopyNext: The specified item could not be found in the keychain.

 What is your name?
 > XW

! Setting your name in git to XW
  git config user.name "XW"

 What is your email?
 > admin@xiaowen.com

! Setting your email in git to admin@xiaowen.com
  git config user.email "admin@xiaowen.com"

------------------------------然后根据提示配置lib,如platform、language等等,即可完成默认的创建过程
To get you started we need to ask a few questions, this should only take a minute.

2024-03-06 15:45:36.289 defaults[9529:76159]
The domain/default pair of (org.cocoapods.pod-template, HasRunBefore) does not exist
If this is your first time we recommend running through with the guide:
 - https://guides.cocoapods.org/making/using-pod-lib-create.html
 ( hold cmd and click links to open in a browser. )

 Press return to continue.


What platform do you want to use?? [ iOS / macOS ]
 > iOS

What language do you want to use?? [ Swift / ObjC ]
 > ObjC

Would you like to include a demo application with your library? [ Yes / No ]
 > No

Which testing frameworks will you use? [ Specta / Kiwi / None ]
 > None

Would you like to do view based testing? [ Yes / No ]
 > No

What is your class prefix?
 > X
security: SecKeychainSearchCopyNext: The specified item could not be found in the keychain.
security: SecKeychainSearchCopyNext: The specified item could not be found in the keychain.
security: SecKeychainSearchCopyNext: The specified item could not be found in the keychain.
security: SecKeychainSearchCopyNext: The specified item could not be found in the keychain.
security: SecKeychainSearchCopyNext: The specified item could not be found in the keychain.
security: SecKeychainSearchCopyNext: The specified item could not be found in the keychain.

Running pod install on your new library.

Analyzing dependencies
[!] CocoaPods could not find compatible versions for pod "XPod":
  In Podfile:
    XPod (from `../`)

Specs satisfying the `XPod (from `../`)` dependency were found, but they required a higher minimum deployment target.

[!] Automatically assigning platform `iOS` with version `9.3` on target `XPod_Tests` because no platform was specified. Please specify a platform for this target in your Podfile. See `https://guides.cocoapods.org/syntax/podfile.html#platform`.

 Ace! you're ready to go!
 We will start you off by opening your project in Xcode
  open 'XPod/Example/XPod.xcworkspace'
The file /Users/rayvision/Desktop/Code/XPod/Example/XPod.xcworkspace does not exist.

To learn more about the template see `https://github.com/CocoaPods/pod-template.git`.
To learn more about creating a new pod, see `https://guides.cocoapods.org/making/making-a-cocoapod`.
➜  Code
创建完成后的目录是这样的:

3、自定义配置
podspec是文件库的描述文件,默认是这样的:
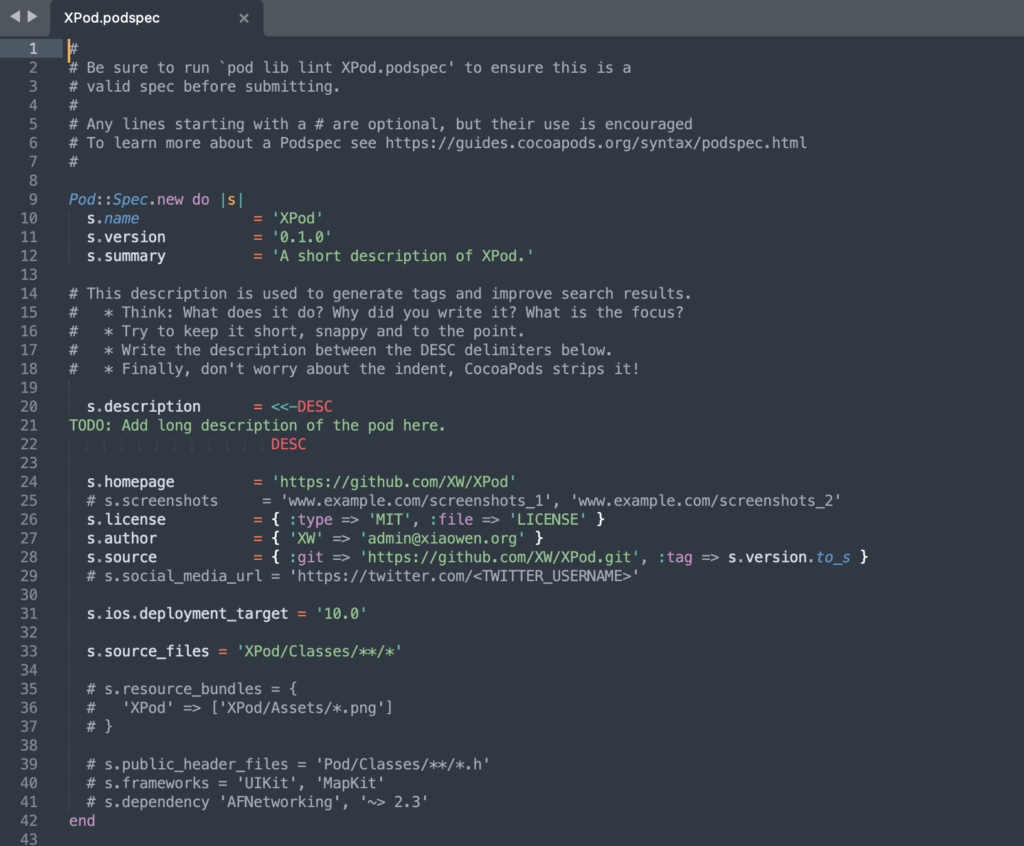
s.source_files
source_files通常用于指定源代码文件,而不是资源文件(如图片、音频等),如果想包含资源文件,可以使用s.resource_bundles或s.resources来指定资源文件的路径。
默认情况下是只包含了Classes目录下的文件
s.source_files = 'XPod/Classes/**/*.{h,m}'如果我们还想用子文件夹开区分不同模块,比如这里新建了一个叫做category的文件夹来放各种分类,UIColor的分类放在UIColor+这个文件夹中,类似地还可以创建一个叫NSString+的文件夹来存放各种NSString的分类
s.source_files = 'XPod/**/*/.{h,m}'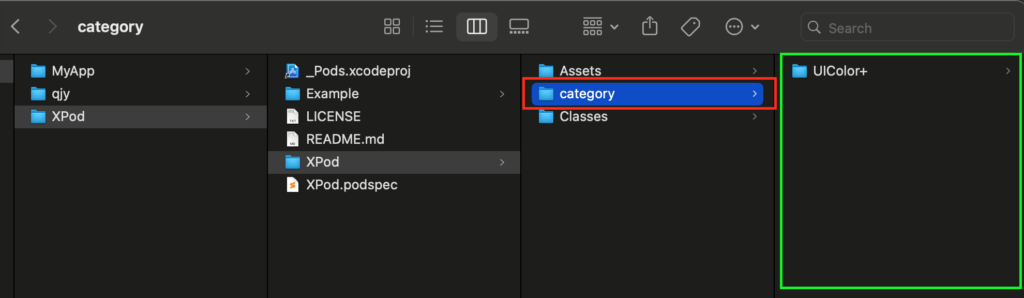
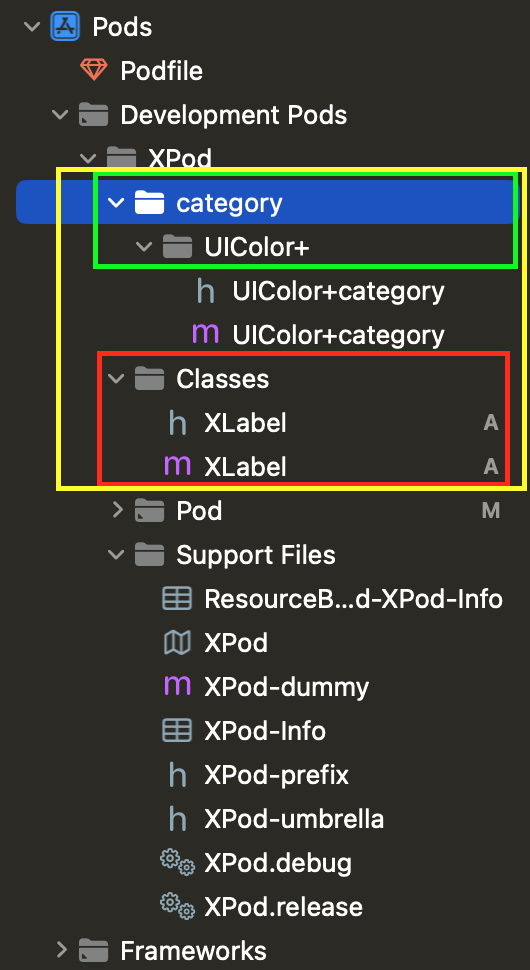
这样配置后,XPod及其子目录下的所有.h和.m文件都会被包含在Pod中。下面绿色部分是我们新增的文件夹,红色部分是默认的文件夹。
s.resources
使用s.resources可以将指定的资源文件直接复制到生成的Framework或静态库中。这意味着这些资源文件会被直接暴露在Bundle的根目录下,可以通过[NSBundle mainBundle] pathForResource:ofType:等方法访问这些资源文件。
s.resource_bundles
使用s.resource_bundles可以将资源文件打包成一个独立的Bundle,并将这个Bundle作为一个整体引入到Pod中。这样做的好处是可以更好地组织资源文件,避免资源文件之间的命名冲突,也可以更方便地加载和管理资源文件。
s.resource_bundles = {
    'XPod' => ['XPod/Assets/**/*.{png, pdf}']
}因此,如果你希望将资源文件直接暴露在Bundle的根目录下,可以使用s.resources;如果你希望将资源文件打包成一个独立的Bundle引入到Pod中,可以使用s.resource_bundles。根据你的需求选择合适的方式来包含资源文件。
4、使用
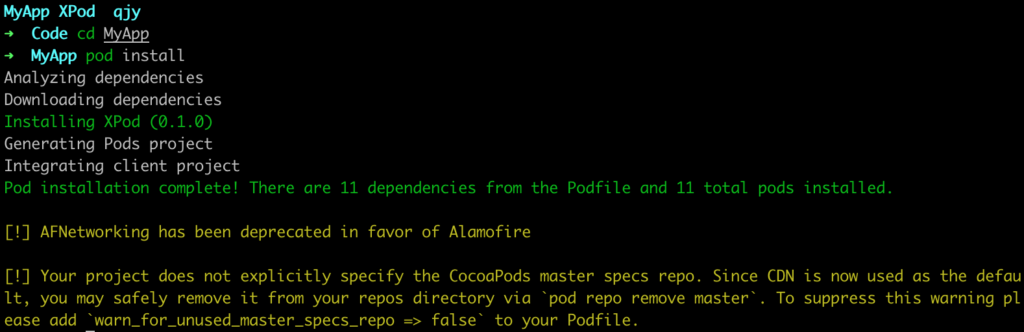
在我们的项目中要使用XPod也很简单只要在Podfile中新增:
pod 'XPod', :path => '../XPod'注意这里使用的是相对路径,然后再执行pod install:
通常情况下,在开发过程中我们都直接使用本地的私有库。当阶段性地完成开发后,可以将私有库放到git上托管。以下是两种不同的引用库的方式:
本地:
pod 'XPod', :path => '../XPod'git:
pod 'XPod', :git => 'https://git.xiaowen.org/ios/XPod.git', :branch => '0.1.0'